Restore your roof’s appearance safely—hire a trusted Philadelphia roofing company in Philadelphia today for expert black streak removal.
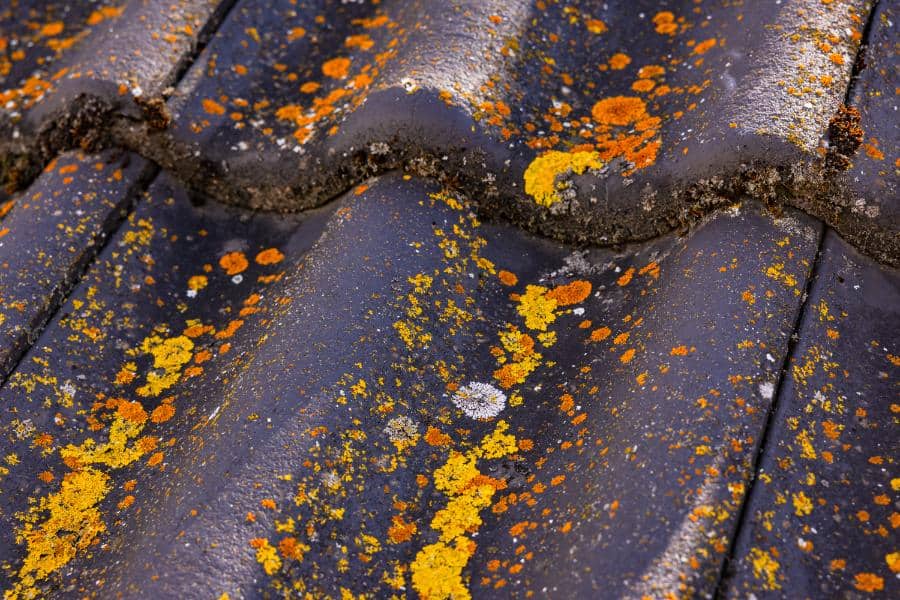
We’ve all seen them: those dark, unsightly streaks running down the roofs of otherwise beautiful homes. They start as faint shadows and gradually darken into bold, black lines that make a roof look old, dirty, and neglected. Many homeowners assume these streaks are caused by dirt, pollution, or even mold. In reality, the culprit is a microscopic organism with a big appetite for your shingles.
These streaks are caused by a type of blue-green algae called Gloeocapsa magma. This hardy bacterium feeds on the limestone filler used in modern asphalt shingles. As it grows and spreads, it forms a dark, protective coating that shields it from UV rays—hence the black streaks. While it’s primarily a cosmetic issue, left unchecked, it can trap moisture and shorten your roof’s lifespan. The good news is that you can banish these streaks and restore your home’s curb appeal without spending a fortune on a new roof. Here is how to clean them safely and effectively.
The Golden Rule: Never Use a Pressure Washer
Before you even think about climbing a ladder, there is one critical rule you must follow: never use a high-pressure washer on asphalt shingles. It might be tempting to blast away the grime with 3,000 PSI of water, but this is the fastest way to ruin your roof. High pressure will strip away the protective mineral granules that shield the asphalt from the sun. Once those granules are gone, your shingles will dry out, curl, and fail prematurely.

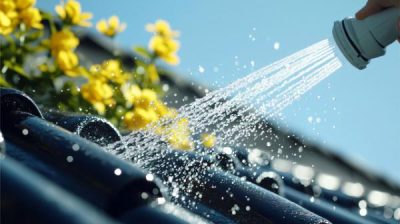
Instead, the industry standard for cleaning roofs is a method known as “soft washing.” This technique uses a specialized cleaning solution to kill the algae at its root, followed by a gentle, low-pressure rinse (similar to a garden hose) to wash away the dead organic matter. It is safe, effective, and won’t void your shingle warranty.
Safety First: Preparing for the Job
Cleaning a roof is not a task to take lightly. If your roof is steep, multi-story, or if you are uncomfortable with heights, it is always safer to hire a professional soft-wash service. However, if you are a confident DIYer with a walkable roof, you can tackle this project with the right precautions.
Choose a cool, overcast day with little to no wind. This prevents the cleaning solution from evaporating too quickly and keeps overspray from drifting onto your landscaping. Wear slip-resistant shoes, long sleeves, gloves, and eye protection. The cleaning solution is potent, and you don’t want it on your skin or in your eyes. Always have a spotter on the ground for safety, and secure your ladder on a stable, level surface.
The Magic Mix: What You Need
You don’t need expensive, proprietary chemicals to clean your roof. The most effective solution is likely already in your laundry room. The Asphalt Roofing Manufacturers Association (ARMA) recommends a simple mixture of <strong>50% household bleach and 50% water</strong>. This concentration is strong enough to kill the algae but gentle enough not to harm the shingles if used correctly.
To make the solution stick to the roof (especially on steeper pitches), add a cup of trisodium phosphate (TSP) or a heavy-duty laundry detergent to the mix. This acts as a surfactant, helping the bleach solution cling to the algae rather than running straight into the gutter. Mix this solution in a standard garden pump sprayer—the kind you use for weed killer.
Protecting Your Plants and Property
Bleach is great for killing algae, but it’s also great for killing your prize-winning roses. Before you spray a single drop on the roof, thoroughly wet all the plants, shrubs, and grass around your home’s perimeter with fresh water. Saturated plants are less likely to absorb any runoff or overspray.
If you have gutters, ensure the downspouts are directed away from sensitive landscaping. You might even want to cover delicate plants with plastic tarps. Once the job is done, rinse the vegetation again to dilute any chemical residue that may have landed on the leaves.
The Cleaning Process: Spray and Wait
Start at the bottom of the roof and work your way up, spraying the solution evenly over the stained areas. Apply enough to thoroughly wet the shingles but not so much that it runs off in streams. You want the solution to dwell on the surface.
Let the mixture sit for about 15 to 20 minutes. You will actually see the algae start to disappear as the bleach does its work, turning the black streaks lighter brown or white. If the streaks are particularly stubborn, you may need to apply a second coat. Do not scrub the shingles. Scrubbing can dislodge the granules just as easily as a pressure washer.
The Final Rinse
After the solution has done its job, gently rinse the roof with a garden hose. Start at the top and work your way down, using a low-pressure spray to remove dead algae and residual bleach. Be patient; it may take a few rainstorms for the remaining dead algae to completely wash off and reveal the clean shingles underneath.
Once the roof is rinsed, do a final lap around the house to rinse off your siding, windows, and landscaping. This ensures no bleach residue is left behind to cause spotting or damage.
Prevention: Keeping the Streaks Away
Now that your roof looks brand new, you want to keep it that way. To prevent the algae from returning, you can install thin strips of zinc or copper near the roof ridge. Every time it rains, small amounts of metal ions wash down the roof, creating an environment where algae cannot survive. This simple, passive system can keep your roof streak-free for years, protecting your home’s beauty and value with minimal effort.